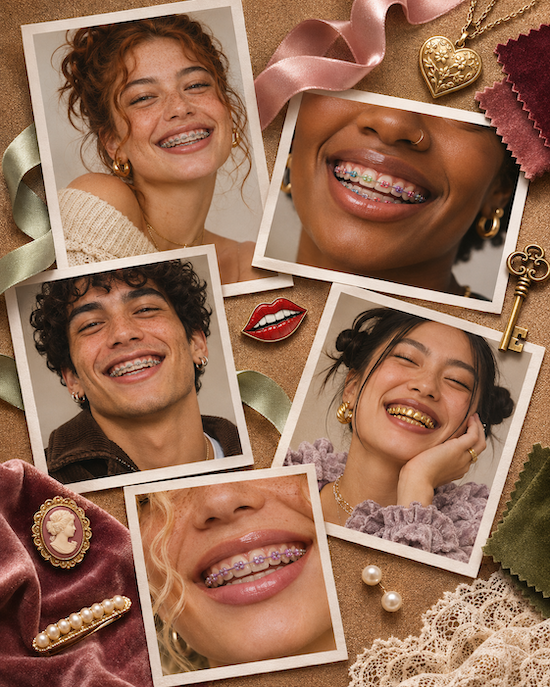
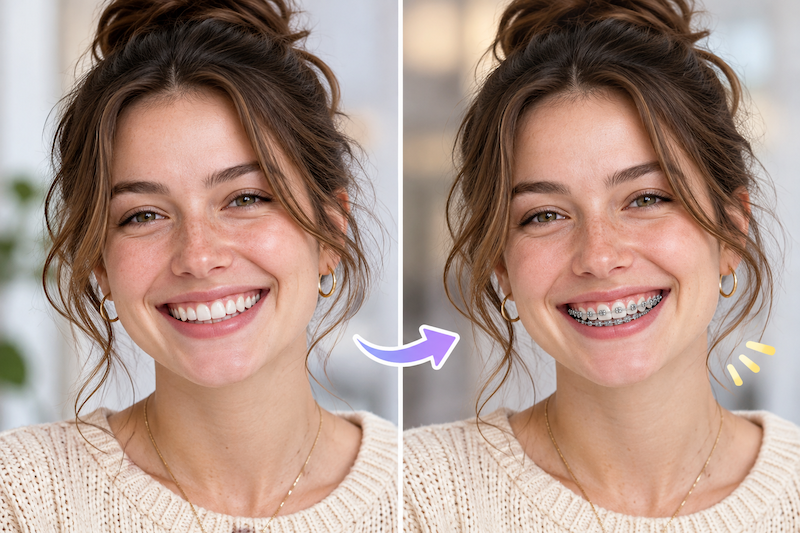
Want to see yourself with braces without actually wearing them? Here’s how to create a realistic-looking braces photo using AI, plus a few tips to make the result look natural.
Have you ever looked at a photo of yourself and wondered what your smile would look like with braces?
Maybe you’re thinking about getting braces someday. Maybe you’re just curious about how metal brackets would look on your teeth. Or perhaps you’ve seen those braces filter photos on TikTok and want to try one yourself.
Whatever the reason, you don’t need Photoshop or complicated editing skills to experiment with the look.
AI photo editing tools can now add virtual braces to a smiling photo, making it easier to explore different styles without manually placing tiny brackets and wires on every tooth.
I wanted to look at how these tools work, what makes a good result, and how you can create your own braces photo in just a few steps.
Why Do People Add Braces to Their Photos?

At first, adding braces to a photo might seem like just another social media trend.
But there are a few reasons people enjoy trying it.
Some people are genuinely curious about orthodontic treatment and want to get a rough idea of how braces might change their appearance.
Others want to experiment with different braces colors or see whether traditional metal braces suit their smile.
And, of course, there’s the fun side of it.
A virtual braces photo can be a playful addition to a TikTok post, an Instagram story, or a before-and-after style comparison.
The nice thing is that you can experiment without making any permanent changes.
Just keep in mind that an AI-generated braces image is a visual effect, not a prediction of how your teeth will move during actual orthodontic treatment.
What Is an AI Braces Filter?
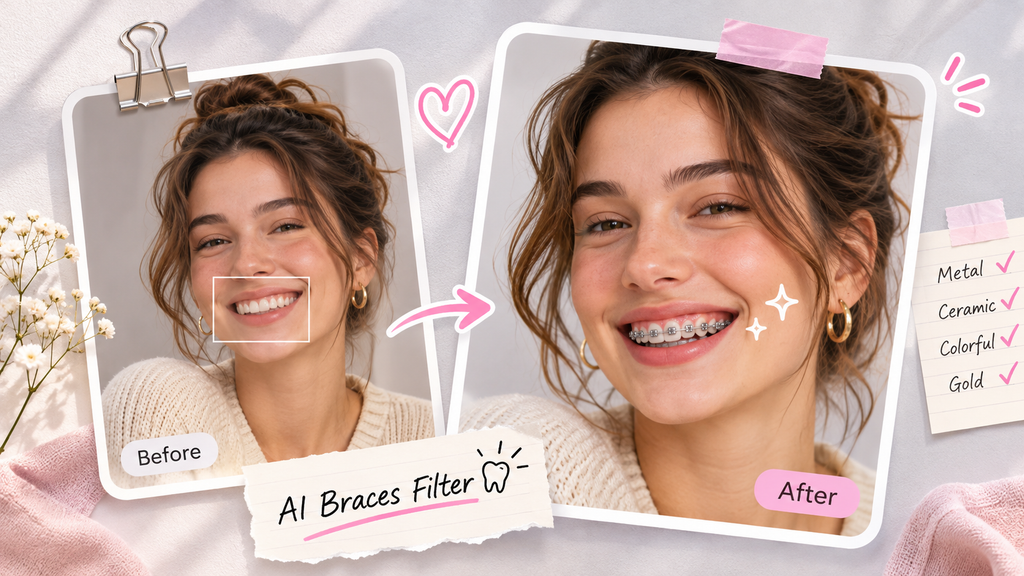
An AI braces filter is a photo editing tool that adds virtual orthodontic braces to the visible teeth in a photograph.
Traditional photo editing requires someone to manually position brackets, adjust their size, create wires, and match everything to the original lighting.
That takes patience, especially when the person in the photo isn’t facing the camera directly.
AI-powered tools aim to simplify this process.
Instead of positioning each bracket yourself, you upload a photo, select an available braces style, and let the system generate the edited image.
For example, the AILabTools AI Braces Filter allows you to upload a smiling portrait and preview braces on your teeth.
The goal is to make the braces blend naturally with the original smile rather than look like a flat sticker placed over the mouth.
A convincing result should account for the visible teeth, smile shape, lighting, and perspective.
The best part is that you can do this directly in a browser, without spending time learning professional image editing software.
How to Add Braces to a Photo in 3 Simple Steps
You don’t need a special camera or a professional portrait to get started.
A reasonably clear selfie with visible teeth is usually a good place to begin.
Step 1: Choose a Good Smiling Photo
Start by finding a photo where your teeth are clearly visible.
This matters more than you might think.
If your lips cover most of your teeth, the editing tool has very little information to work with. The same problem can happen when your face is turned too far sideways or the image is blurry.
For a better result, look for a photo with:
- A natural smile showing your teeth.
- Good lighting around your face.
- A reasonably clear view of your mouth.
- Minimal blur or heavy filters.
- No objects covering your lips or teeth.
You don’t have to smile as widely as possible.
A relaxed, natural smile is often enough.
Step 2: Upload Your Photo and Choose a Braces Style
Next, open the online braces filter and upload your chosen photo.
Once the image is uploaded, select one of the available braces styles.
Traditional silver metal braces are a good starting point because their brackets and connecting wires are easy to recognize.
Depending on the available options, you may also be able to experiment with different materials, colors, or decorative styles.
This is where virtual try-on becomes interesting.
You can explore the appearance of braces without having to rely on your imagination.
After selecting your preferred style, click the Generate button to start the process.
Step 3: Check Your New Smile
Once the image is generated, take a closer look at the result.
Don’t just glance at the photo and assume everything looks perfect.
Zoom in on the mouth.
Are the brackets positioned naturally along the teeth? Does the wire follow the curve of the smile? Does the lighting still match the original picture?
Also, check the rest of your face.
A good braces edit shouldn’t noticeably change your nose, lips, jawline, hairstyle, or facial expression.
If the result looks natural, you can save the edited image and compare it with your original photo.
That’s all there is to it.
No manual brushing, layering, or adjusting individual brackets.
What Makes a Braces Filter Look Realistic?
I’ve noticed that the difference between a convincing braces photo and an obviously edited one usually comes down to a few small details.
The first is bracket placement.
Real orthodontic brackets follow the position and orientation of individual teeth. If an AI filter places them in a perfectly straight horizontal line while the smile curves naturally, the result can look strange.
The second is lighting.
Metal brackets reflect light, but those reflections should make sense within the original photograph.
A selfie taken near a window should not suddenly have braces that look like they were photographed under bright studio lights.
The third is preserving the original face.
When you’re adding braces, you’re not trying to create a completely different person.
Your skin texture, lips, teeth, and facial expression should remain as consistent as possible with the uploaded image.
Finally, there’s the overall balance.
Braces should be noticeable, but they shouldn’t dominate the entire photo or look oversized compared with the teeth.
These details are worth checking before sharing an AI-generated image.
Which Braces Style Should You Try?
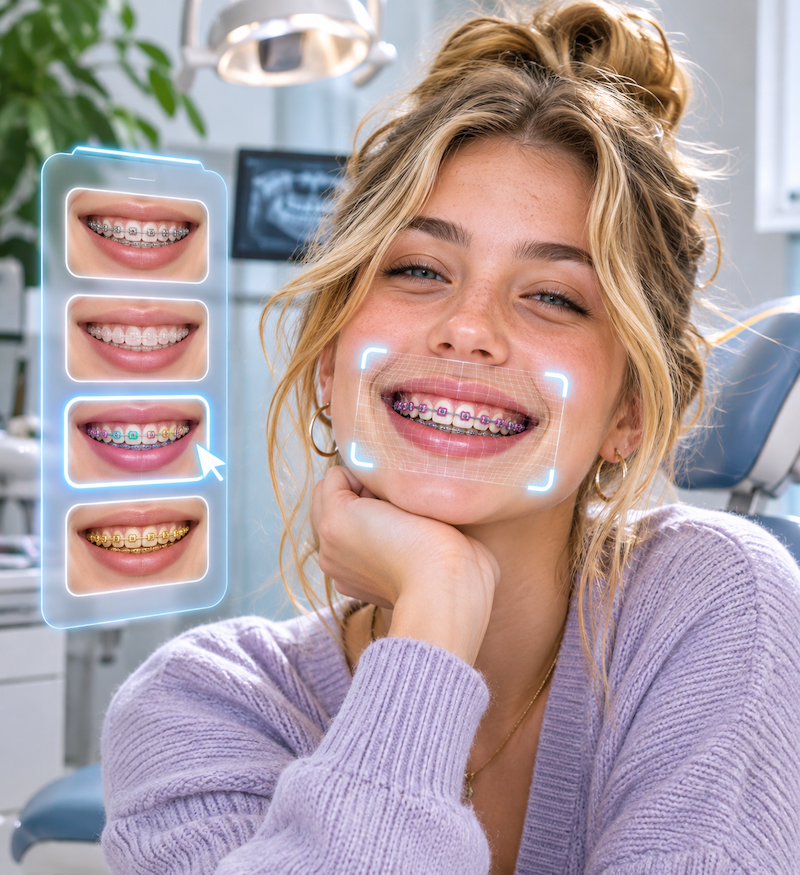
One of the more enjoyable parts of experimenting with virtual braces is comparing different styles.
Here are a few common orthodontic looks you might want to explore.
Traditional Metal Braces
These are the classic silver brackets and wires most people recognize.
They create a clearly visible orthodontic look and are a useful starting point for a virtual braces photo.
Ceramic Braces
Ceramic braces use tooth-colored or translucent brackets, giving them a less noticeable appearance than traditional metal brackets.
They’re worth considering if you’re curious about a subtler braces look.
Colorful Braces
Colored elastic bands can add a playful touch to traditional braces.
Pink, blue, purple, and other colors can change the overall appearance of a smile, making this style particularly fun for creative photos.
Gold and Rose Gold Braces
Gold-toned and rose-gold styles offer a different visual appearance from standard silver braces.
They can be interesting options for fashion-inspired portraits or social media images.
Remember that virtual styles depend on what your chosen tool currently supports. Not every filter offers every orthodontic option.
Also, a virtual image can’t tell you which type of braces is clinically suitable for your teeth. That’s something an orthodontist needs to assess.
Common Mistakes When Adding Braces to Photos
Even a good AI braces filter can struggle with certain images.
Here are some common issues to watch for.
Using a photo where the teeth are barely visible
If most of the teeth are hidden behind the lips, an AI tool may have difficulty placing the brackets naturally.
Uploading a heavily filtered selfie
Beauty filters sometimes smooth or alter the mouth area. That can remove details needed for accurate-looking placement.
Choosing a very blurry image
When individual teeth are difficult to distinguish, the generated braces may appear misplaced or unrealistic.
Ignoring the original smile shape
A convincing edit should follow the person’s existing teeth and smile rather than replace them with a completely different mouth.
Expecting the filter to predict orthodontic treatment
This is probably the most important distinction.
A braces filter shows an imagined appearance of wearing braces. It does not simulate tooth movement, treatment progress, or the final clinical outcome.
Treat the result as a creative preview, not dental advice.
Can You Use Braces Filter Photos on Social Media?
Absolutely. That’s one of the most enjoyable uses of this type of photo editing.
You could create a simple before-and-after comparison with your original selfie on one side and the AI-generated braces version on the other.
Or you could test several styles and ask your friends which one they prefer.
Virtual braces photos also work well for casual social content, smile transformation posts, or experimenting with different looks.
One small suggestion: if you’re posting a generated image as part of a personal story, consider mentioning that it was edited with AI.
That helps avoid confusion, particularly if the picture looks realistic enough that people might think you’ve actually started orthodontic treatment.
Frequently Asked Questions
Can I add braces to a photo without Photoshop?
Yes. An online AI braces filter can generate virtual braces on a smiling portrait without requiring manual editing in Photoshop.
Can I see what I would look like with braces?
Yes. You can upload your own photo and generate a visual preview of braces on your smile. Keep in mind that the image is a creative simulation rather than a clinical prediction.
What is the best photo for a braces filter?
A clear, well-lit portrait with visible teeth usually works best. Avoid strong blur, extreme camera angles, and objects covering your mouth.
Will an AI braces filter change my face?
A braces-specific filter is intended to edit the teeth area, but AI-generated images can sometimes introduce unwanted changes. Always compare the result with the original photo.
Are AI braces filters the same as orthodontic treatment simulators?
No. A braces filter creates a visual effect showing how braces may appear on a smile. Professional orthodontic simulations involve dental records, clinical measurements, and treatment planning.
Ready to See Yourself with Braces?
Trying braces on a photo is a surprisingly simple way to experiment with a different smile.
You don’t need to be a photo editing expert, and you don’t need to spend time manually drawing brackets and wires onto your teeth.
The most important thing is choosing a clear photo, selecting a suitable style, and checking that the final result looks natural.
If you’re curious about how braces might look on you, you can try the AI Braces Filter by AILabTools and create your own virtual braces photo.
Whether you’re exploring a possible future look or just having fun with a new photo trend, it’s an easy way to experiment with your smile.
And sometimes, seeing the result is much more interesting than simply imagining it.